Create a Text Portrait in Photoshop
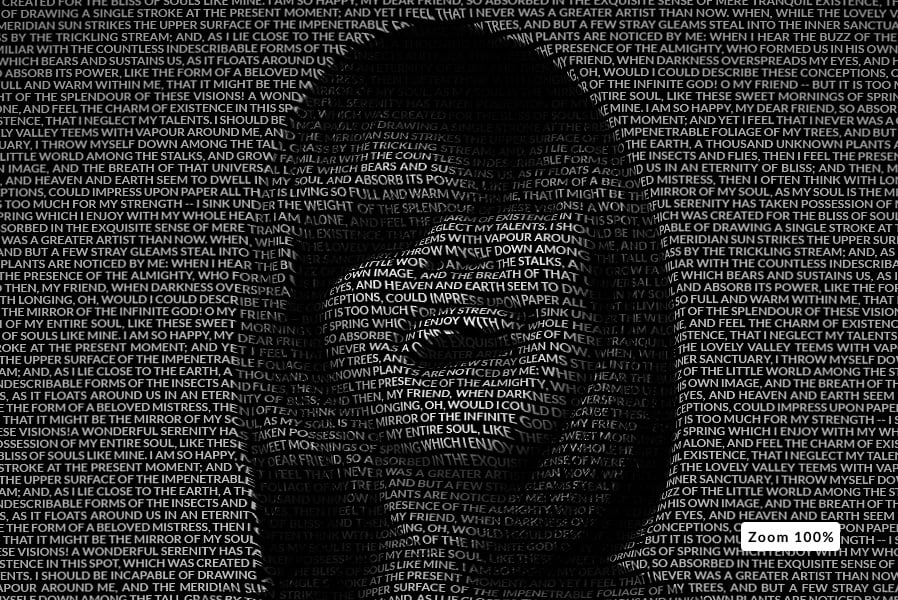
oday you will learn a fast, easy and effective way to create a modern calligram. It is a great effect made entirely in Photoshop that will transform any image into a text-made one. According to Wikipedia, a calligram is: “a text visually arranged in a way that it forms an image associated with the text's contents. It can be a poem, a phrase, or a single word; the visual arrangement can rely on certain use of the typeface, calligraphy or handwriting, for instance along non-parallel and curved text lines, or in shaped paragraphs.” But today, we will make a 21 century calligram using Photoshop.
Step 1
Open you image into Photoshop. I will be using a stock image of a smiling woman at 1200px x 795px, but you can use any image you want (animals, objects, etc) with any dimensions.

Step 2
Go to Layer > Duplicate Layer. Name this layer as “B&W†and click OK.

Step 3
Select the “B&W†layer in the layers panel and go to Image > Adjustments > Desaturate.
Tip: If your desaturated image does not have a good contrast, you may increase it a bit by using the Brightness/Contrast under the Image > Adjustments menu.
Tip: If your desaturated image does not have a good contrast, you may increase it a bit by using the Brightness/Contrast under the Image > Adjustments menu.

Step 4
Go to Layer > Duplicate Layer. Name this layer as “Mapping†and click OK.

Step 5
Go to Filter > Blur > Gaussian Blur and set the Radius to 5px. If your image is bigger, enter a big Radius value. As reference, for an image of 1200px a value of 5px will be ok, if your image have 3000px a value between 8/10 for the Radius will work.

Step 6
Go to File > Save As and save this document as “DisplacementMap.psd†anywhere you like (remember where you save it).
Step 7
Select the “Mapping†layer in the layers panel and delete it by clicking on the Delete Layer icon.

Step 8
Select the Type Tool (T) and draw a container across the entire canvas. Paste your text here, and be sure that your text cover the entire canvas dimensions to achieve a nice effect. In this case, I will be using Lato Bold at 12px size with a leading of 12px, a text color set to “#000000†and all caps.
If your image is bigger, you may want to increase the size and leading as well until you are happy with it.
If your image is bigger, you may want to increase the size and leading as well until you are happy with it.

Step 9
With the text layer still selected go to the Paragraph tab. Uncheck the “Hyphenate†option and set the Paragraph style to “Justify allâ€.

Step 10
Go to Filter > Distort > Displace. Click Ok to rasterize the type layer. In the Displace window set the following values and click OK:

Step 11
Locate the file “DisplacementMap.psd†we saved before and click Open. As you may see, the text is now mapped using the blured image we did before.

Step 12
Turn off the text layer visibility in the layers panel by clicking on the eye icon next to the layer name.

Step 13
Hold down the Control key in your keyboard and click over the text layer thumbnail in the layers panel to select the content.

Step 14
Go to Edit > Copy Merged and right after this go to File > New. Photoshop will automatically set the new document dimensions to the ones we just copied, so we just need to name this new document as “Text Portrait Effect†and click OK.

Step 15
In this new document we just created, go to Edit > Paste.

Step 16
Select the Background layer and go to Edit > Fill. In the Contents section select “Black†from the dropdown menu. Be sure to have the Blending Mode set to “Normal†and the Opacity to “100%†and click OK.

Step 17
Now select the layer above the Background (usually named as “Layer 1â€) and Go to Filter > Sharpen > Smart Sharpen and apply the following values:
Note: If your image is bigger, you may need to increase these values to match your image settings.
Note: If your image is bigger, you may need to increase these values to match your image settings.


Conclusion
Now that you learned how to make this effect, downsize the image to see how the text becomes a sort of pattern/ texture when viewed from a distance while the image is clearly visible, and how the text becomes more legible when you see it close to you.


by Diego Sanchez


Comments
Post a Comment